
More and more people are teaching their dogs a variety of clever and unusual actions and behaviors commonly presented as "tricks." To give more entertainment value to tricks, one evolutionary step would be to make movies using these actions and behaviors, along with the dog's entire trained repertoire, to tell a story. Movies are fun to create and fun for audiences to watch.
Internet websites are teeming with videos of people showing tricks they have trained their dog(s) to perform. These videos have become widespread and commonplace. As a natural progression in the evolutionary process and to add entertainment value, many trainers are doing performances where they link a number of tricks together in some sort of theme, others are using tricks in musical canine freestyle routines, and some are producing movies.
Creating stories for movies that use the dog’s entire trained repertoire opens up new opportunities and challenges for dog training enthusiasts as well as a whole new field of entertainment possibilities. Even if everyone used the same actions, behaviors, and tricks, each movie would be unique because each moviemaker would put their own spin on a story and each dog’s trained actions and behaviors would be used in different contexts. Well-conceived, well-acted dog movies evoke emotions in the viewer, making them memorable. Movies are also a way to preserve, in a fun-to-watch format, all that a beloved dog has been trained to do, whether for limited viewing or to be put on the Internet for the entire world to see.
I have always been intrigued by dog actors and have been making movies of my own dogs for many years. I write scripts to fit each dog’s personality, creating scenes where my dogs’ actions and behaviors tell the story, using trained behaviors that look like emotions to make their performances believable. I also try to capture any spontaneous action my dogs might do that highlights the uniqueness of their personalities as I can often use these to enhance a scene.
In my article Clicking the Canine Actor (January ’09) written for the German-language Clicker Magazine, I related what type of things I train my dogs for "acting" in their movies. In this article, I will take the reader through constructing a short movie.
Note: Quite a bit of time is invested in writing a script, training the dog(s), shooting video, and editing clips on the computer; therefore, I suggest keeping the movie short . . . less than ten minutes in length. Short movies will maintain the moviemaker’s motivation and help preserve the flow and continuity in filming. It will also force the moviemaker to discard superfluous footage and use only those sequences that are necessary to tell the story. (Having made several 30-minute movies, I speak from experience.)
BASIC MOVIE CONSTRUCTION
1) Start with a concept for the story (what will the story be about?) Is it a comedy or drama, action flick or an adaptation of a well-known story?
2) Make a list of the major behaviors you want to present.
3) Develop a story line and think of scenes where you can use these behaviors.
4) Write the script.
5) Decide where each scene will take place and at what time of day.
6) Make a storyboard (a storyboard is a sketch of each shot in a scene so you can see how it relates to the next shot in the sequence).
7) Train the behaviors and practice them in the location where they will be shot.
STORY CONCEPT
The story featured here is one that everyone knows – the fairytale of Hansel and Gretel. Using an established story allows us to by-pass the normal questions the audience has at the beginning of a movie: "What’s it about?" "What are they doing?" "Why are they doing it?" Everyone knows the story about Hansel and Gretel being abandoned in the woods, how an old hag tries to lure them into an oven, and how, ultimately, the children are reunited with their father. Since the story is so well-known, we can deviate quite widely by using dogs as the central characters and altering the events, and the audience will still follow the story.
In most movies, the visual content and dialog are what develops a story. Dialog and imagery are used to foreshadow what’s to come later in the movie: this setting-up takes time. One way to shorten the process is to narrate the story and let each clip in the movie illustrate the words. This allows us to use narration to tell the audience what is happening rather than taking the time to visually lead them to a reason the dog is doing a specific action or behavior. However, the visual aspects in the movie should be so well-conceived that the story can stand on its own without narration.
In a movie, the first thing we need to see is the setup: the first few minutes of a movie tell us what we need to know to get the story started. What’s the movie about? Where is it located? It is designed to give us a direction for our story. The setup usually begins with a visualization that gives us a strong sense of the place, mood, texture, and sometimes the theme of the movie.
After the initial image begins the story, we need to be introduced to the characters. We need information about their situation: "Where are they?" "What’s going on?" Then, some event needs to start the story. This is the catalyst which begins the action in the story. Once that happens, the audience then knows what the story is about. In our "furry tale" of Hansel and Gretel, once the dogs have decided to run away from home, the audience knows that the consequence of their decision can put them in grave danger. This raises the central question: "Will they overcome their challenges and find their way back home?" Once that question is raised, the setup is complete. The story is now ready to unfold.
In even the shortest story, there are usually three acts: Act One raises the central question, "What is the movie about?" A catalyst occurs that triggers the main character(s) to take an action that starts the sequence of events. Act Two is the action in the story that is precipitated by the catalyst in Act One. Act Three is the climax of the story followed by a short resolution that ties up loose ends.
SHOOTING THE MOVIE
We’ve written our script, made our storyboard, and trained our dogs to perform the behaviors needed for the movie. We are now ready to begin shooting. To make a movie, a bare minimum of two people is needed: one to work with the dog(s) and one to run the camera. My husband and I have been doing this successfully for over ten years. Even better would be one more person to hold lights and do other "helper" jobs. Working with more than one dog in a shot (as I often do) can be a challenge. The director of the movie Beethoven II, which is about two Saint Bernards and several puppies, once said, "Working with more than one dog in a scene isn’t double the trouble, it’s 100 times the trouble." And . . . big-screen movies have lots of handlers to work their dogs!
As each scene in the story leads us to the next one and builds on the previous scene, I like to shoot scenes in the order in which they appear in the story because sometimes things occur that require me to make slight adjustments in a subsequent scene or shot. However, in commercial movies, scenes are rarely shot in the order in which they appear.
Using a variety of camera positions and techniques will make your movie not only more interesting but also easier to edit. Below are camera positions and concept shots that were used in making Hansel and Gretel. See if you can identify them in the movie.
These "Five Essential Positions" were dispersed throughout the movie:
1) Ground level
2) Dog shoulder height
3) Under armpit (often used in tight quarters)
4) On shoulder
5) High Position
Additionally, we used these techniques:
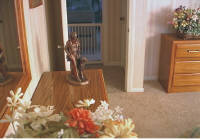
1) Angled – (an object that angles from the foreground to the background -- gives three-dimensional perspective)
2) Foreground Framing – (gives depth to field by putting something in front of shot to frame subject who is at a distance)
3) Walk out of Frame Shot – (great for transition to next shot)
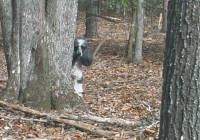
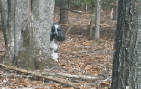
4) Behind Tree Shot – (gives a voyeuristic look)
5) Point of View Shot – (Camera is on subject and then gives subject’s Point of View of something.)
6) Cutaway – (Usually a close-up of something in the shot that relates to the action. A shot used to help or strengthen the master shot and give added insight into the story. Get more cutaway shots than you think you’ll need. They can save you in editing.)
7) Zoom Shot – (Start with a close-up and zoom slowly out to see full view.)
8) Walk-over Shot – (Camera is ground level and actors walk over or by camera.)
9) Window Shot – (Someone is seen through a window.)
10) "Jaws" Shot – (Frame dog at a distance by zooming in close then walk towards dog and zoom back at the same time. It gives an unsettling look.)
11) Overhead Shot – (A God’s eye view.)
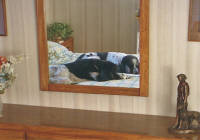
12) Reflection Shot – (Seeing subject reflected in something)
When preparing to shoot, visualize how a first-time audience will see your movie. What information do they need in that shot to understand what is going on? Give them this and no more. Wide shots are needed in some scenes to orient the audience to where the characters are located. Close
-
up shots show the dog actor's expression. Think of what the audience needs to see in order to understand the scene. Think about where each shot needs to go in order to link up with the next one in the scene. A well-structured scene will often have its own three acts, with a clear beginning, middle, and end.
Take more footage than you think you need. Take cutaway shots, close-up shots, shots from different angles and different frame sizes (wide, medium, close-up) and, in many cases, repeat the master shot even though everything looked right as the dog will give you something in one shot that you don't get in the others. Cutaways and close-ups can save a sequence in editing.
For instance, if you have two clips that are vital to the story that must be adjacent, but you find they make a jump cut when put together, having a cutaway shot or a close-up to go in-between the two clips will often make them usable. Also, when you log video footage into the computer, capture all clips that look good even though you think they won't fit in your script. These odd shots have an unexpected way of being “just right” for something you need in a sequence.
Once you have all the camera shots captured into your video editing program and have edited them into their correct sequence, turn the sound off and look at just the visual story as if you were a complete stranger seeing it for the first time. Would this stranger be able to understand what is going on just by watching the movie without sound? If you are satisfied they could, add narration and sound effects. Finally, put in carefully selected music to enhance and complement the ambience of your story. Music adds power and unity to your visual scene.
Below is the narration for my HANSEL AND GRETEL script.
HANSEL AND GRETEL, a furry tale
A Canine Horizons Production
Starring Jyah and Sydney
ACT I
(Opening Scene)
Hansel and Gretel lived in a nice house. Their family loved them dearly, and they had lots of toys to play with. Hansel was very good to his sister and always took care of her. Gretel felt like a princess and thought she should always do just as she pleased. And . . . she was NOT pleased to share toys. If Hansel had a toy, Gretel wanted that one too. Gretel wanted ALL of the toys.
(Catalyst Scene)
One day, Hansel and Gretel were reading books.
Suddenly Gretel thought, "What's that spot? It looks like spaghetti sauce? Deeeeelicious!"
She began munching the paper.
Hansel watched in dismay . . . Gretel was going to get in so much trouble!
Soon Gretel had swallowed the whole page.
"You shouldn't have done that, Gretel!"
When their mom saw what Gretel had done, she was very angry
.
Being a gentleman, Hansel tried to take the blame, but Mom said, “BAD GIRL GRETEL!”
"Well!" thought Gretel. "I do NOT deserve to be scolded!"
She decided to run away to teach her mom a lesson.
She carefully packed her suitcase.
She would hide in the woods for a little while. That would teach Mom not to scold her.
Meanwhile, Hansel had found a place to eat his cookies where Gretel wouldn't find him.
However, when he saw that Gretel was leaving, he decided to go along to watch over her.
ACT II
(In the Woods Scene)
Gretel trotted happily through the woods . . . with Hansel following.
Hansel soon saw that Gretel was not paying attention to where she was at ~~
~~ and, she was getting further and further away from home.
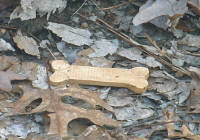
He decided to drop cookies along the way so they could find their way back.
He cleared the ground around the cookie so it would be easier to see.
Unfortunately, he didn't notice that Gretel was following behind eating all of the cookies.
Hansel trotted down the road - confident in what he had done.
When Gretel caught up, she said, “Thanks for the cookies, Hansel. I was getting hungry.”
“Silly girl,” barked Hansel, “How are we going to find our way home!” “Who cares,” said Gretel, “Let's have fun!”
They played king-of-the-mountain games, climbed trees, and explored the woods until they came to a ravine.
Luckily, there was a bridge of sorts over the space so they could cross to the other side.
(The Woodsman Scene)
Soon, they came to a clearing. A woodsman was sitting by a campfire cooking bacon.
Gretel's mouth watered! "I so deserve to have bacon,” she thought.
She walked right up to the woodsman who fed her a piece of bacon.
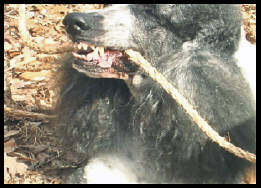
Then . . . he put a rope around her neck!!
It suddenly occurred to Gretel that she had made a slight error in judgment.
Hansel was horrified!
The woodsman took Gretel over to a tree and tied her up then went back to the campfire to finish his meal.
Gretel was very depressed.
She longed to be home again in her safe, warm house with her family and all of her toys.
(Hansel Saving Gretel Scene)
Meanwhile, Hansel had hidden behind a tree and watched.
As soon as the woodsman's back was turned, he crawled a ways, rolled over, and hid behind a rock
Then he sneaked from hiding place to hiding place . . . until, unseen, he crawled to Gretel.
Once there, he chewed in two the rope that bound her.
Gretel jumped over Hansel, and they both dashed away.
The woodsman leapt to his feet and shouted,
“Hey! Come back here!”
But Hansel and Gretel ran and ran as fast as they could . . . and they ran and they ran until they got home.
ACT III
(Ending Scene)
After her frightening experience, Gretel vowed never to run away again.
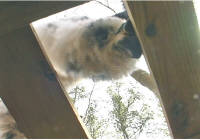
Suddenly, the doorbell rang!!
“Who could that be?”
Their mom answered the door. It was the woodsman!!
He said,
“I found Gretel in the woods, I was going to bring her back to you, but Hansel chewed through the rope and she escaped. I hope they're both alright.”
Mom thanked the woodsman then turned to Gretel and said, “Here, let me take this rope off, Gretel. You are very lucky that your brother takes such good care of you. You could have really gotten yourself into trouble!”
Then Mom praised Hansel for his bravery.
(Conclusion)
Gretel decided to show Hansel how much she appreciated what he had done by giving him all her toys.
What a nice sister, thought Hansel.
“Er, why are you looking like that?”
Gretel thought, “I REALLY like my toys. Maybe I'll keep that one . . . and that one . . . and that one . . .”
“Gretel!!!”
* * * * * * * * * * * * * *
Hansel and Gretel - a furry tale
Adapted and edited by Charlene Dunlap
The part of Hansel was played by Jyah
The part of Gretel was played by Sydney
Coached by Charlene Dunlap
Camera and technical support by Glenn Dunlap
Music by: Gene Michal Productions, CSS Music, Fresh Music
Copyright February 1, 2009
Canine Horizons Productions

Walk-over Shot
Camera is under bridge as dogs cross it.